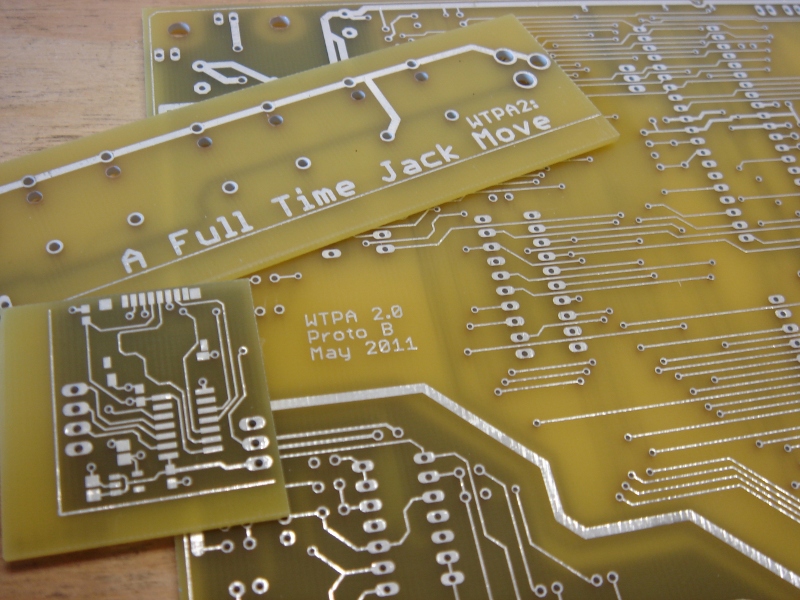
So I got the test PCBs Monday, bare as the day they were born. The last couple days I’ve been going through all the circuits and checking the hardware for problems, bugs, things to optimize, and stuff that would otherwise be Bad To Deal With in a run of 200 units.
The good news: The third rev of boards does more or less all the stuff it is supposed to, and has most of the performance improvements I’d expected. However, nothing is perfect.
First, let me give you young nerds a piece of advice. Become rich. Then use your dough to buy prototype boards that have a soldermask. Good lord. You will save yourself hours in debugging stupid soldering problems, and gray hair in debugging other problems which you may at first erroneously attribute to solder bridges.
Bare PCBs do offer an advantage in that they’re easy to probe wherever you need to, and all that exposed tin makes it easy to solder fixes in, but in general they will make you crazy at least once with some weird connection that you didn’t mean to make. That was the first round of problems I had to solve.
With those out of the way came the first real, serious, problem: The VCO. The VCO got incorporated in the last board rev and I dutifully wanked on it a few times and then set it aside to deal with other problems. This in retrospect was quite stupid, because if I had paid more attention I could’ve saved myself a lot of time and a little false advertising.
It turns out that the VCO design I used (ripped wholesale, with a few changes, from Horowitz and Hill p. 240, who I’m pretty sure in turn ripped it wholesale-with-changes from the LM324 datasheet) is good in many regards. It is single supply and simple. It requires only opamps and a fairly generic transistor or FET. The problem came in trying to tune the monster over a wide range. Though the TLV2474 opamps I’m using are pretty good at RRIO, they aren’t perfect.
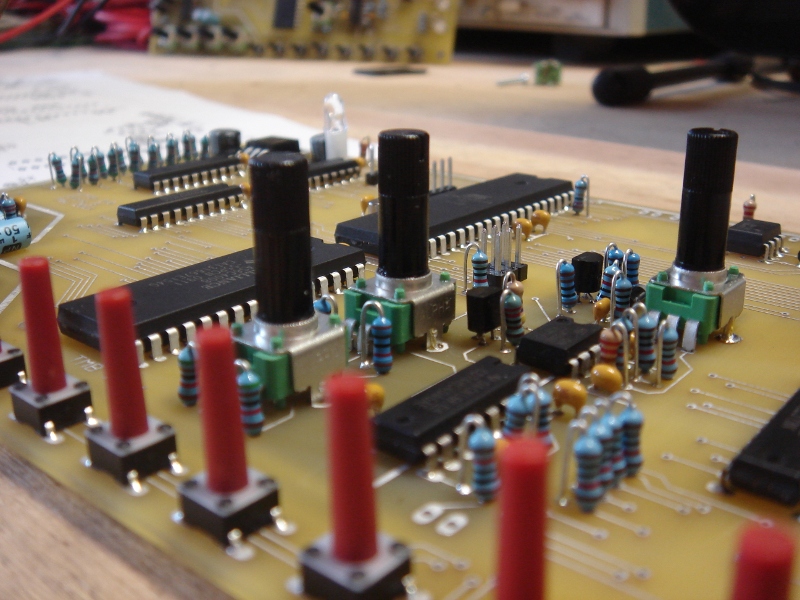
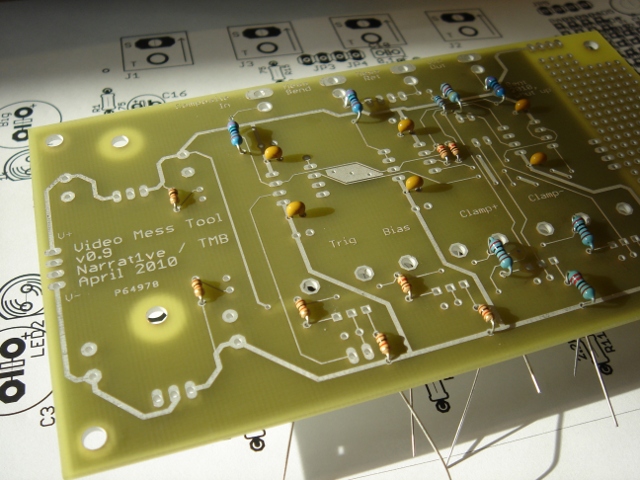
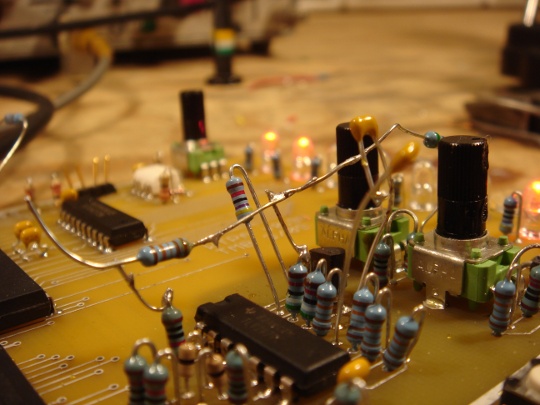
All the drama occurred when the CV was some small number of millivolts from the bottom rail. The ‘2474s don’t really want to drive that low, so I made the little Merce Cunningham looking mess of dancing resistors (pictured above) to help pull them there. Simple enough, but a little ugly.
Approaching REALLY closer to the rail (say within 10mV or less) the VCO stops responding in anything approaching a linear fashion and gets jittery and tends to drop out. Normally I wouldn’t care and would just bias the CVs above 10mV, but that ends up being a significant amount of tuning in the low-sample rate range. Which is silly. _NO_ op amp is that good, really, and no good design should try and expect one to be assuming it isn’t colliding particles or something.
With a marathon all-nighter / all-dayer the best performance I could get from the VCO was a not-so-great 2kHz to 16kHz, a tuning range of 8-to-1. This sucks. In retrospect the humble relaxation oscillator of the first WTPA did something like 60-to-1.
I fiddled around trying to get another VCO design breadboarded for a little while, but all the good ones I know use an OTA. I’ve seen some designs with analog switches and of course plenty with specialized VCO ICs, but I had three op amp sections and a dream. The final decision was to drop the VCO, return to the traditional relaxation oscillator, and reduce the opamp from a quad to a dual. Even Saving You Money(tm) in the process.
For those of you crying “Noooo! How will I make it talk to my Modular?” first let me say — samplers usually don’t talk to modular synthesizers, you’re spoilt. Second, let me say, because I love you, and because that’s a weird and cool idea, I’ve worked out a way to make the sampler’s oscillator clock sync up to audio inputs — so you’re losing a VCO, but you’re gaining a sync! This means that now you can synchronize your samples to your vocal line, synth line, guitar, or any signal in the audio frequency range.
This should work pretty reliably — I’ll know soon. I can no longer say “The only sampler with a VCO” but I think the new effect will probably be cooler anyway.
Everything else: I found a hardware bug in the in-circuit serial programming section related to changing around the data bus. I fixed with some pullup resistors. After that I made sure the switches and LEDs worked with the new bus structure. It’s technically still possible to PWM the LEDs and maybe I’ll do that sometime before release, but it’s low on the list. Next I quantified the bus-turnaround time related to the bus routing changes, and they’re almost invisible. It took some NOPs in the ISR, but I bet I can optimize those out later. I tested the MIDI output — so far WTPA has only received midi messages. But today it took charge, such as it can.
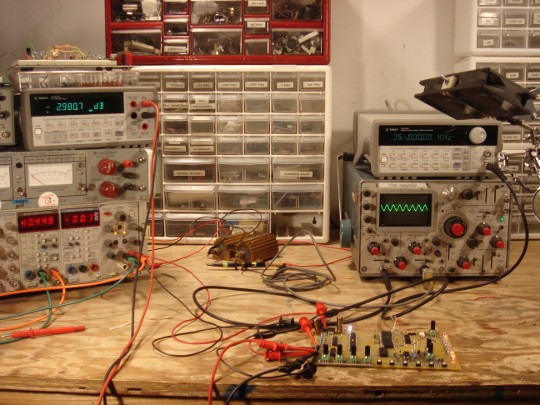
Finally, I took a look at the audio path. This was important and enlightening. Using a function generator and a fancypants benchtop meter set to take dB readings, I figured out the f3dB points for all the different audio paths through the system. They were pretty good — the first reading showed the audio range of the sampler’s pass-through and DAC paths to be about 14Hz-356kHz (pictured above). Not bad!
Still, as a rule of thumb (also ganked from H&H) I try and position f3dB points 10 times greater or less than the frequency of interest to avoid phase shifts in the audio range. You know what they say about phase shifts, right? “They make for weak ass west coast bass, not that Miami shit.” That’s what I heard them say.
Anyway, I got the range for those paths to be more like 2.8Hz to 370kHz with a few changes. In the overdub path I managed to actually DC couple some of the connections which means that there should be no loss in that path relative to the rest of the sampler.
Giving it the listen test, it sounds Really Good. I’m happy with the audio quality. It’s nice and quiet where it should be, with good frequency response, leaving it free to Expose Da Crust in all the important parts.
Finally, there was one more valid thing I found. In an effort to keep impedances (and costs) low I settled on two values of potentiometer for the final thing — a 500k audio taper for the input and output amp gain controls and 1k linear pots for everything else. In all the audio controls on the board, the 1k pots have a resistor from the wiper to ground to approximate a logarithmic curve (and make your life silky smooth). This means that the total resistance in some places in circuit ends up being pretty darn low. Although this does keep noise pickup low and the top f3dB point high, it also ends up working out the driving opamps something fierce. My hot rail-to-rail output doesn’t swing nearly as rail-to-rail as it used to. This of course means less usable bits in our sample. I can fix this a little by chaning the tapering resistors on the pots, but the right thing to do would be to bump the pots up to 10k and scale their related circuits. Easy enough, if I didn’t have a boatload of pots on the way from China already. The ENOB isn’t terrible, but it could be a little better. Hey, what’s a design if there isn’t room for revision?
Lastly, before I leave the soapbox, I’d like to take this opportunity to show this off as yet another example of an old TMB truism: Analog Be Harder Than Digital. Not better, but harder, and perhaps by association more noble and romantic.
While I was frantically breadboarding crappy VCOs, I came across this app note in which that continuous font of inspiration, Jim Williams, designs like 10 analog circuits which are complicated enough that they make my head spin even after reading his explanations, and he figures them out for shits in his garage or something, while on vacation. There’s a badass VCO in there which tests my understanding, and whose makeup is also (or consequently?) not quite right for WTPA.
Oh, and it also made me always remember to refer to VCOs as “Voltage to Frequency Converters” again. Saying VCO makes you sound like Jean-Michel Jarre; saying VFC makes you sound like a curmudgeon with a white beard and a bunch of Teflon caps and bandgaps. Who would you rather be?
Hello, big bag of Chinese boards? Perhaps you would like to come over?
Xoxoxo, TMB